Snow globes are a classic past time that has been enjoyed for years. Get kids crafting the cold away with this fun winter activity. Learn how to make your own snow globe with these quick and simple steps.
Supplies You will Need
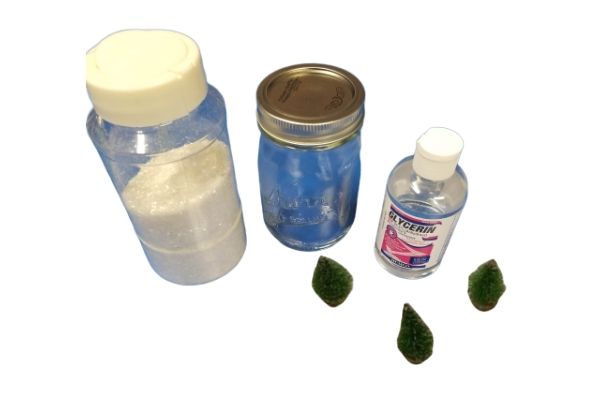
- A mason Jar
- Hot Glue Gun
- Small Christmas trinkets – like Trees, or Snowman figurines
- Glitter
- Glycerin
- Water
How to make your own snow globe
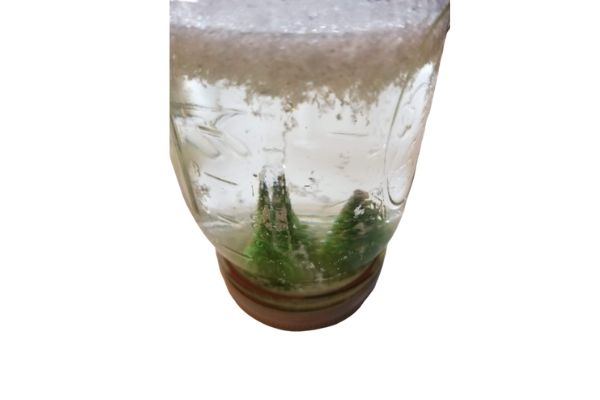
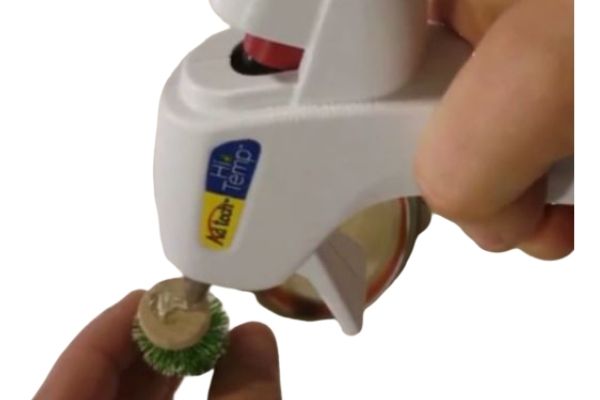
The first step in creating your own snow globe is to wash the mason jar. You want a clean jar to create a beautiful globe. Next, plug in your hot glue gun and allow it to heat up. Remove the lid from the ring. Using your hot glue gun apply a generous ring of glue around the inside of the ring. Then quickly press the lid into the ring and hold it for 10-15 seconds. You want to make sure the glue adheres. This is another safety measure so water does not leak out of the jar.
Your next step is to use the hot glue gun and secure your trinket to the inside of the lid. Hold each item down after you apply the glue.
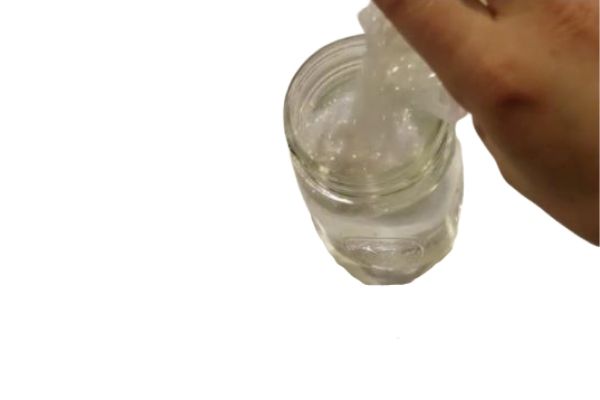
Fill your jar about 3/4 of the way full of water. You will probably add more water later but its easier to add water than remove it. Then add a few drops of glycerin into the jar of water. Put the lid on and shake it. Next remove the lid and add glitter. You can add it a little at a time until you think you have the perfect amount.
Now, test the globe. Put the lid on the jar, be careful not to spill water or bump the trinkets while putting into the jar. Tighten the lid as much as you can. Then flip it over and give it a test. If the water level is to low add some more. If you want more glitter add some more. Experiment until you have your own one of a kind snow globe!
If you want to be extra sure the jar will not leak, put a bead of hot glue around the mouth of the jar and quickly put the figurine inside of the jar and twist the jar as tight as possible.